Ponytail Bucket Hat Crochet Pattern
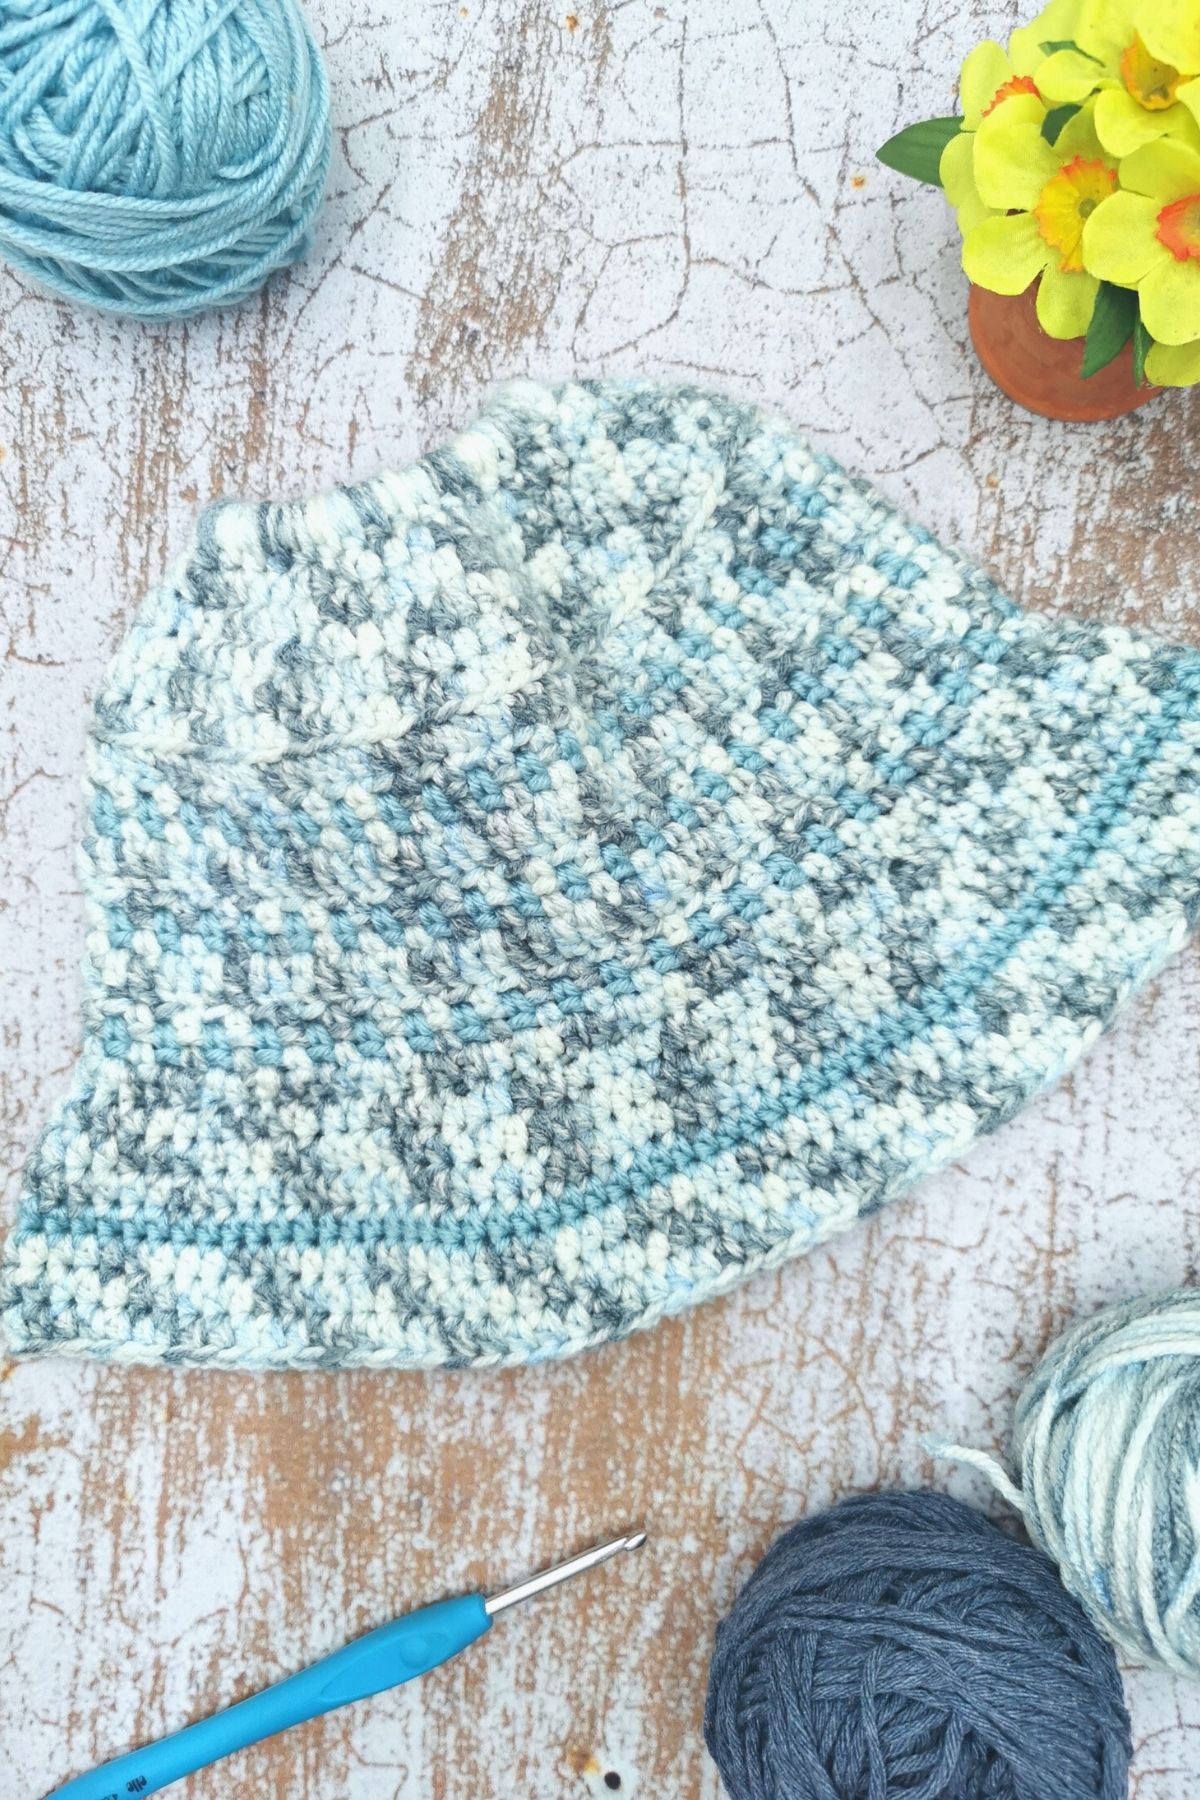
I made another version of the Bucket Hat Crochet Pattern and I think this one is my absolute favorite – the Ponytail Bucket Hat which has a hole in the top of the hat so you can put your ponytail through it. Perfect for those hot summer days in the sun! It’s also very handy when you have a bad hair day! 🙂

Let’s dive into the deeds:
Before you start with this Easy Ponytail Bucket Hat Crochet Pattern, here are some important things to know and some background around this pattern.

The Detail of the Bucket Hat Crochet Pattern
This is the sister crochet pattern of my last blogpost where I shared the free pattern for the normal Bucket Hat. It’s almost exactly the same – the only difference being that you begin the hat like a messy bun beanie , using a hair tie! How neat is that?! I’ve added photo’s to the pattern below if you have never made a messy bun beanie before which shows you exactly how to crochet around the hair tie. It’s really easy!
The detail of the Bucket Hat is created using a combination of single crochets and double crochets. While the top and brim of the hat is created using half double crochet. See what I mean when I say it’s super easy? If you’ve made the normal Bucket Hat I shared a couple of weeks ago, believe me, you will make this one in no time!

While your here :), be sure to have a look at some of my other easy crochet patterns like:
- Beginner-friendly Bucket Hat
- The Stylish Messy Bun Hat
- Oh-so-easy Beanie
- The Granny Square Bag
- Easy Shell Stitch Twisted Headband
All patterns on my blog are absolutely FREE of course!! 🙂
The pattern level:

This Bucket Hat crochet pattern is an easy crochet pattern. You need to know the following:
- How to read a pattern
- Single Crochet (Sc)
- Half Double Crochet (Hdc)
- Double Crochet (Dc)
- Crocheting around a hair tie
- Work in the back loop only of a stitch
- Work in the front loop only of a stitch
- Crochet in the round
If you are new to crochet and not familiar with any of the above mentioned, please click on the links and follow the easy tutorials! You will be able to make your Ponytail Bucket Hat in no time!!!

Some FAQ and answers:
Can I adjust the size of the Bucket Hat?
This crochet pattern is made is to fit the average woman head size. If you would like a smaller version, scroll down to the pattern notes where I explain how to make the hat smaller.
If you would like it bigger, please feel free to leave me a comment down below in the comments section!

What Yarn Should I use?

I used #4 worsted weight cotton yarn for this bucket hat. The Yarn I used is a blend of cotton and polyester, but you can use 100% cotton yarn. If you would like to use any other yarn like Acrylic you definitely can! That hat will the be perfect for chilly days! I used Acrylic yarn for the Ponytail Bucket Hat below and it came out great!
Be sure to make a gauge swatch before you make your hat to find out if you have the correct size yarn and hook!
I used Yarn Art Eco-Cotton XL Blend in the color Gray which comes in 200g/7.04oz (220m/240yds). If you can’t find this specific yarn then you can use something like Lily Sugar ‘n Cream 100% Cotton or Bernat Handicrafter Cotton Yarn.

Let me know if you have any other questions by leaving a comment down below!! 🙂
The materials needed for the Bucket Hat?
You will need the following materials:
- 200g/ 7oz (220m/ 240yards) of #4 Worsted weight 100% Cotton yarn or cotton yarn blend.
- Size 4mm Hook (US G/6)
- Measuring tape
- Stitch Markers
- Tapestry Needle
- Scissors
- A Hair Tie

Let’s get started!
Now that you know all that is need to be known, I will not keep you any longer from crocheting this Easy Ponytail Bucket Hat Crochet Pattern.
Remember to follow me on Facebook and Instagram and share your creations with me on all my social platforms. Also pin this on your Pinterest boards if you want to make it again. And also remember to subscribe to my YouTube Channel for easy Crochet Tutorials and also easy to follow videos on my free crochet patterns!
Happy Crocheting!!! 🙂
~Nadine

Ponytail Bucket Hat Crochet Pattern
This pattern is written in US Terms
Patten Level:
Easy
Materials:
- 200g/ 7oz (220m/ 240yards) of #4 Worsted weight 100% Cotton yarn.
- Size 4mm Hook (US G/6)
- Measuring tape
- Stitch Markers
- Tapestry Needle
- Scissors
Abbreviations:
- Ch = Chain
- Ch1-spce = Chain 1 space (chain space created by the ch1 of previous round)
- Sc = Single crochet
- Hdc = Half Double Crochet
- Dc = Double Crochet
- BLO = Back Loop Only
- FLO = Front Loop Only
- Inc = Increase (adding 2 stitches into designated stitch)
- Mid = Middle
- Nxt = Next
- Rnd = Round
- Sl st = Slip Stitch
- St(s) = Stitch(s)
- Rep = Repeat
- Rem = Remaining
- Sk = Skip (Skip the next stitch)
Gauge:
10cm x 10cm / 4in x 4 in = 12 rows x 16hdc
Finished Size:
Made to fit average woman head size.
Circumference = 57cm / 22½in
Notes:
- Be sure to make a gauge swatch before you make your hat to find out if you have the correct size yarn and hook!
- This pattern is worked in the round. Each round is started with a chain 1 and closed off with a slip stitch into the first stitch of the round.
- When starting with the first rows of hdc around the hair tie, move and space the stitches evenly around the hair tie as you go. The hair tie might show, but this will be covered with your hair, so don’t worry too much about that.
- For a smaller size / tighter fit stop increasing at round 8. Then move on to the rest of the pattern
- Place a stitch marker in the first stitch of each round.
- 2hdc / *hdc means 1hdc in each of indicated sts like 2hdc = 1hdc in next 2 stitches or 4hdc = in next 4 stitches.
- Number of stitches are shown in brackets () after each row.
Ponytail Bucket Hat Crochet Pattern:
Attach the yarn to the hook with a slip stitch. Insert the hook through the middle of the hair tie and slip stitch to connect.

Rnd 1: 40hdc around the hair tie, place a stitch marker in your first st, sl st into 1st st at the end. (40)

Rnd 2: ch1, *3hdc, inc in nxt st* rep from * until end, sl st in 1st st to connect rnd. (50)

Rnd 3: ch1, 2hdc, inc,*4hdc, inc in nxt st* rep from * until 2 sts rem, 1hdc in each of rem sts, sl st in 1st st to connect rnd. (60)
Rnd 4: ch1, *5hdc, inc in nxt st* rep from * until end, sl st in 1st st to connect rnd. (70)
Rnd 5: ch1, 3hdc, inc,*6hdc, inc in nxt st* rep from * until 3 sts rem, 1hdc in each of rem sts, sl st in 1st st to connect rnd. (80)
Rnd 6: ch1, *7hdc, inc in nxt st* rep from * until end of rnd, sl st in 1st st to connect rnd. (90)

Rnd 7: ch1, 1hdc in same st, 1hdc in BLO in each st around, at the end sl st in 1st st to connect rnd. (90)

Rnd 8: ch1, sc in 1st st, *ch1, sk 1 st, sc in nxt st *, rep from * until end of rnd (you will end rnd on ch1), sl st in 1st st to connect rnd. (90)

Rnd 9: ch2 (counts as ch1-spce), * sk 1 st, sc in ch1-spce, ch1 * rep from * until end of rnd (you will end rnd on sc in ch1-spce), sl st in top of ch2 to connect rnd. (90)
Rnd 10: ch1, sc in 1st ch1-spce, ch1, *sk 1 sc, sc in ch1-spce, ch1 * rep from * until end of rnd ( you will end on ch1 and sk 1 sc) sl st to 1st sc of rnd. (90)

Rnd 11: ch2, dc in same st, *dc in ch1-spce, dc in nxt st* rep from * until end of rnd, sl st in 1st to connect rnd. (90)

Rnd 12 – 18: Rep rnds 9-11 until you reach rnd 18. Ending on rnd 11 of sc rnds.

Rnd 19: ch1, hdc in same st, *hdc in ch1-spce, hdc in nxt st* rep from * until the end of rnd, sl st in 1st st to connect rnd. (90)

Brim:
Rnd 20: Working in FLO for this rnd, ch1, 4hdc, inc, *8hdc, inc in nxt st* rep from * until 4 sts rem, 1hdc in each of rem sts, sl st to 1st st of rnd. (100)
Rnd 21: ch1, *9hdc, inc in nxt st* rep from * until end of rnd, sl st to 1st st of rnd. (110)
Rnd 22: ch1, 5hdc, inc, *10hdc, inc in nxt st* rep from * until 5 sts rem, 1hdc in each of rem sts, sl st to 1st st of rnd. (120)
Rnd 23-26: ch1, 1hdc in each st around until the end of rnd, sl st to 1st st of rnd. (120)

At the end, finish off your yarn and weave in all loose ends as secure as possible.

First it says all rounds are ended with a so st, then, it says the first 9 rounds are continuous. Which is right?
Hi Amy. Thanks for pointing that out. You can just follow the pattern as is where you connect each round with a slip stitch. The continuous rounds note was incorrect and I have removed it from the notes.