Easy Crochet Bear Lovey (Teddy Bear Security Blanket)
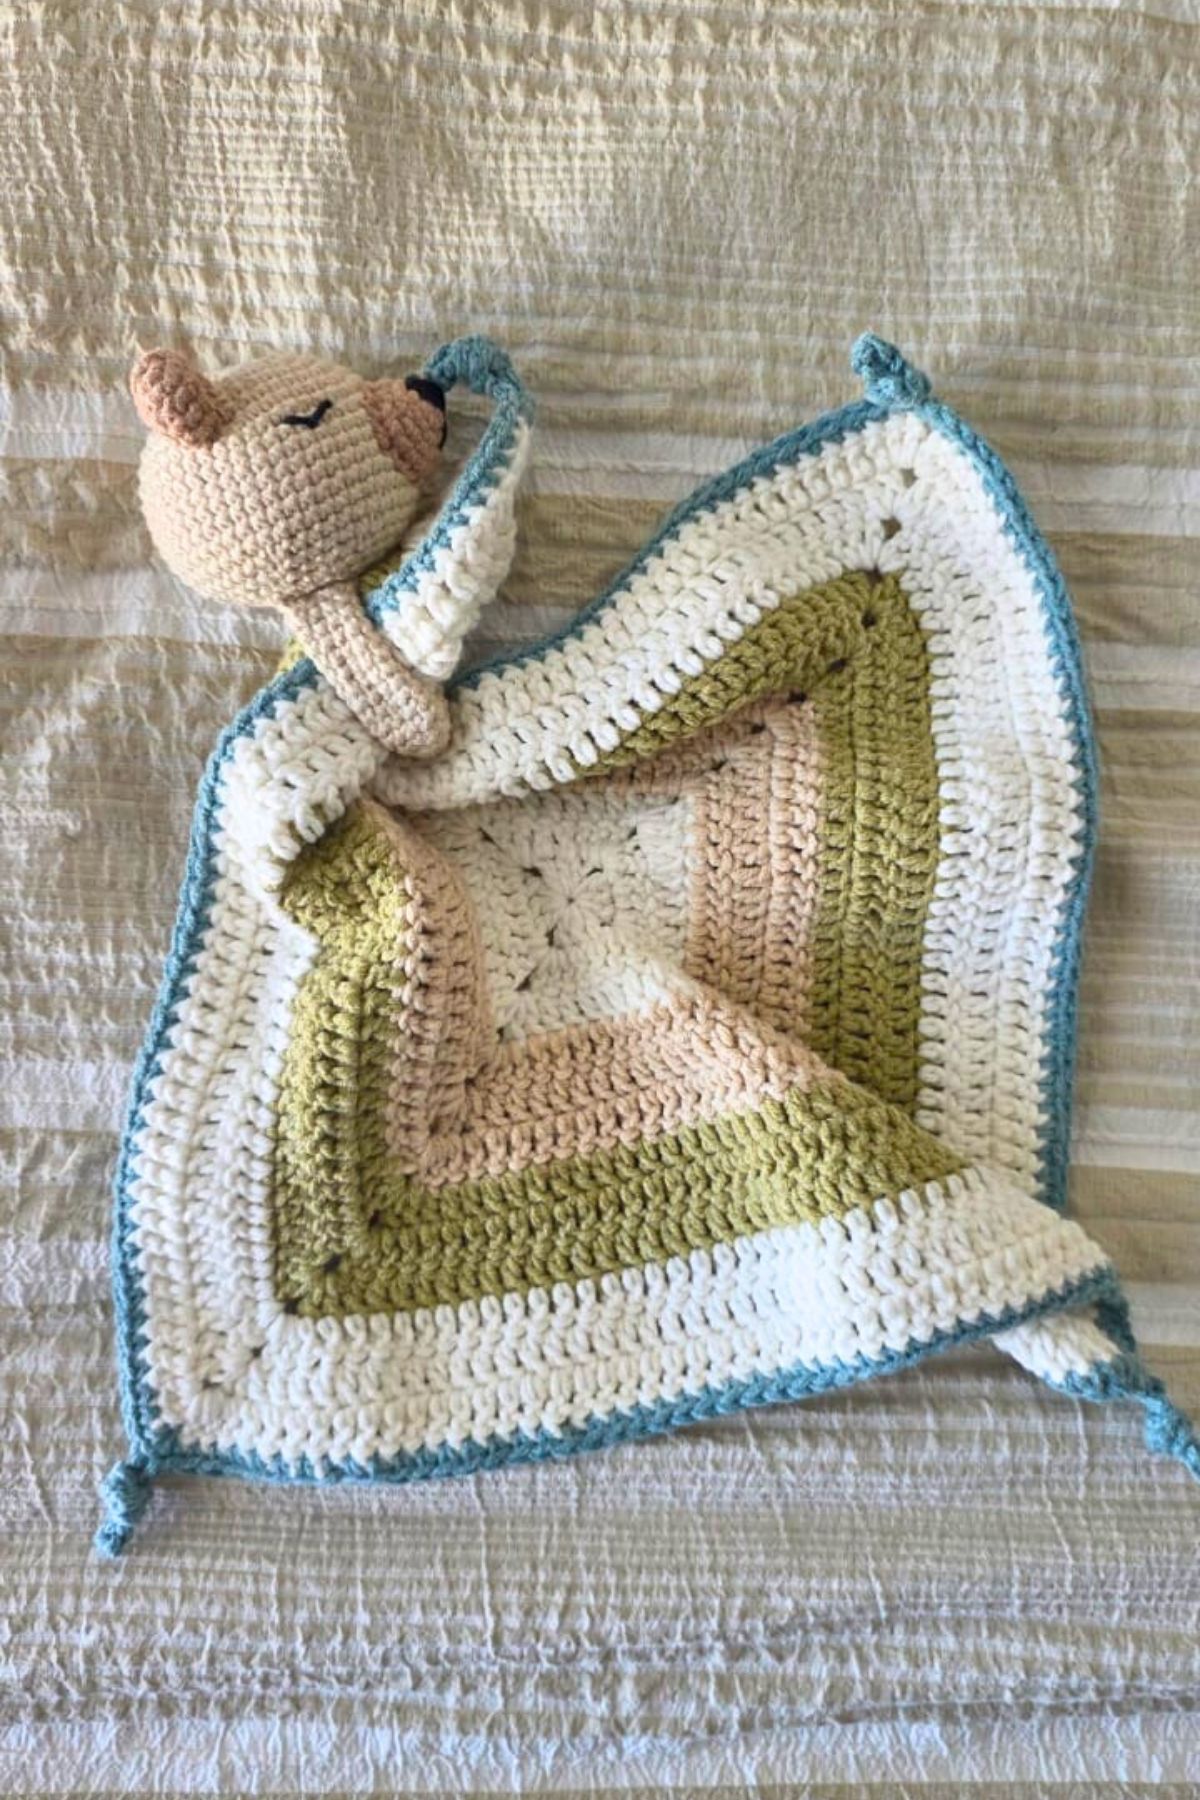
If you’re looking for a sweet and easy handmade gift for a baby shower, new arrival, or toddler, this Easy Crochet Bear Lovey is the perfect project! This soft and snuggly teddy bear security blanket works up beautifully using simple stitches and lightweight DK yarn. It’s designed with beginners in mind. If you can make a granny square and crochet a few basic amigurumi pieces, you can make this adorable bear lovey.
This free crochet pattern includes step-by-step instructions for the bear head, muzzle, ears, arms, and a cozy, solid granny square blanket. The best part? You can easily customize the colors to match a nursery theme or your favorite palette.
Whether you’re crocheting for your own little one or making a heartfelt handmade gift, this bear lovey is sure to become a naptime and bedtime favorite!

Why You’ll Love This Crochet Bear Lovey
- Completely beginner-friendly
- Uses easy stitches: sc, dc, inc, dec
- The blanket is a continuous solid granny square
- Perfect stash-buster for DK yarn
- Works up quicker than traditional amigurumi
- Makes a beautiful baby shower or newborn gift
- Free pattern with clear, step-by-step instructions

Inspiration Behind the Pattern
This bear lovey was inspired by classic teddy bears and the comfort items little ones naturally cling to. I wanted to create a pattern that combined the cuteness of amigurumi with the softness of a traditional crochet baby blanket. The solid granny square design keeps the blanket warm and beginner-friendly, while the bear’s simple features make it both charming and gentle in appearance.
The final touch and my favorite part, is stitching the blanket between the bear’s arms so it looks like the bear is holding it. It creates such a sweet, cozy look!

Materials You’ll Need
- DK / #3 Lightweight Yarn, 4 colors, 50g/1.76oz or 100m/109yards each
- Hooks: 3mm (US C) and 4mm (US H)
- Black Yarn for Facial Embroidery
- Stuffing
- Stitch Markers
- Tapestry Needle
- Scissors
- Safety Pins
Crochet Stitches & Abbreviations
- MR = magic ring.
- SC = single crochet.
- INC = increase (2 sc in the same stitch).
- DEC = decrease.
- CORNER-SP = Corner Space.
- SL ST = slip stitch.
- CH = chain.
- DC = double crochet.
- ST(s) = stitch(es).
- R = round/row.
Gauge & Finished Size
Gauge is not critical for this pattern, which makes it even better for beginners. The final size will depend on the yarn and hook you choose, but the lovey typically measures a comfortable baby-friendly size with a soft, plush bear head attached.
Pattern Notes
- The bear head, ears, muzzle and arm pieces are worked in continuous rounds without joining.
- Use a stitch marker to mark the first stitch of each round.
- Stuff the head firmly but avoid overstuffing, as this can create gaps.
- Pin pieces in place before sewing for the best positioning. Add the embroidery details to the face, after you have assembled the ears and muzzle.
- Keep your tension consistent throughout.
- The blanket is a continuous solid granny square made with dc stitches and corner increases.
- Weave ends as you go for a cleaner finish.
Final Assembly
Below is an example of how to pin on the different parts of the head to make it easier for you see the final product before you start sewing. Make adjustments until you are happy with what you have and then sew the parts to the head.

Sew the ears and muzzle onto the bear’s head, embroider the eyes and nose, attach the arms, and secure the top of the blanket between the bear’s arms so it looks like the bear is holding or hugging the blanket. This final touch gives your lovey an adorable, cuddly finish that little ones will love.

Tips for Customizing Your Crochet Bear Lovey
Want to make your lovey even more special? Try these ideas:
- Use self-striping yarn for an effortless color fade
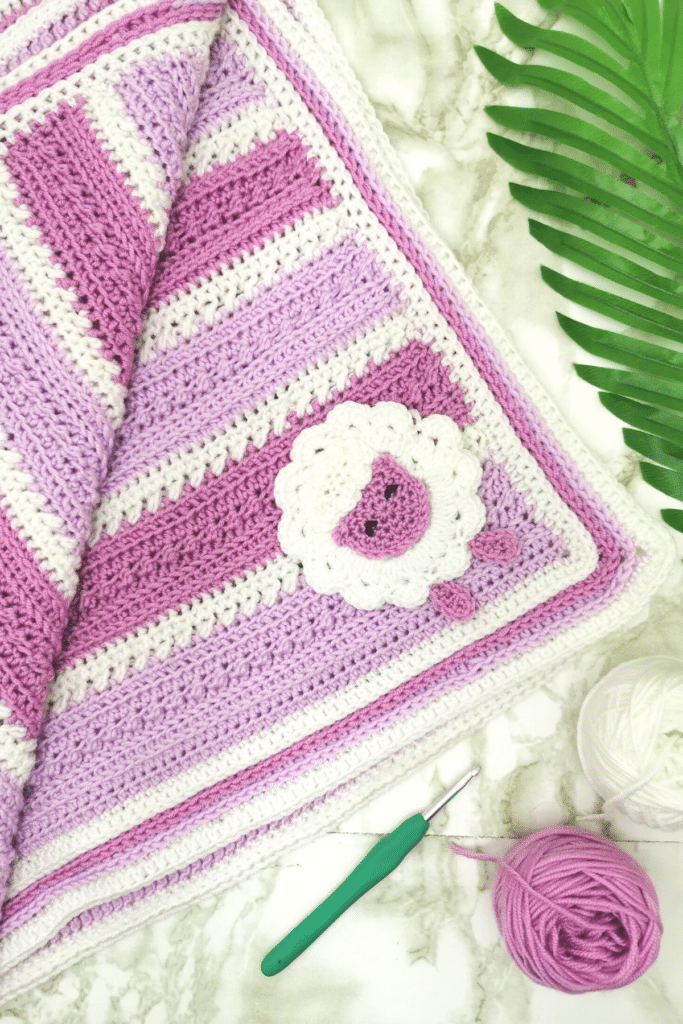
- Add a delicate scalloped border to the blanket
- Create multiple loveys in different colors for gift sets
- Embroider the baby’s initials on the blanket corner
- Choose neutral tones for a minimal, modern nursery look

While your here :), be sure to have a look at some of my other free crochet patterns like:

Perfect For Baby Showers, Gifts & Keepsakes
A handmade lovey is a thoughtful and meaningful gift that parents treasure for years. This teddy bear security blanket combines the warmth of a crochet blanket with the comfort of a plush toy—ideal for snuggles, naps, and soothing moments.

If you make this pattern, I’d love to see your version! Share it on Instagram or Pinterest and tag me so I can celebrate your creation.
Let’s get started!
Remember to follow me on Facebook and Instagram and share your creations with me on all my social platforms. Also pin this on your Pinterest boards if you want to make it again. And also remember to subscribe to my YouTube Channel for easy Crochet Tutorials and also easy to follow videos on my free crochet patterns!
Happy Crocheting!!! 🙂

Did you crochet this pattern? Be sure to leave a comment down below!

Easy Crochet Bear Lovey (Beginner-Friendly Free Crochet Pattern)
About the Pattern
- The bear head, ears, muzzle and arm pieces are worked in continuous rounds without joining.
- Use a stitch marker to mark the first stitch of each round.
- Stuff the head firmly but avoid overstuffing, as this can create gaps.
- Pin pieces in place before sewing for the best positioning. Add the embroidery details to the face, after you have assembled the ears and muzzle.
- Keep your tension consistent throughout.
- The blanket is a continuous solid granny square made with dc stitches and corner increases.
- Weave ends as you go for a cleaner finish.
- Commas separate stitches.
- (sc, inc) = sc in the next stitch, then increase in the next stitch.
- (4sc, inc) = single crochet in next 4 stitches, then increase.
- [sc, inc] x 6 = repeat the sequence inside brackets 6 times.
- Stitch counts are shown in ( ) at the end of each round.
Tools and Materials
- DK / #3 lightweight yarn 4 colors, 50g/1.76oz or 100m/109 yards each
- Hooks: 3 mm (US C) and 4 mm (US H)
- Black yarn for facial embroidery
- Stuffing
- Stitch markers
- Tapestry needle
- Scissors
- Safety pins
Instructions
Part 1 – Bear Head
- With main color and 3 mm hook:
- R1: 6 sc in MR (6)
- R2: [inc] x 6 (12)
- R3: [sc, inc] x 6 (18)
- R4: [2sc, inc] x 6 (24)
- R5: [3sc, inc] x 6 (30)
- R6: [4sc, inc] x 6 (36)
- R7: [5sc, inc] x 6 (42)
- R8: [6sc, inc] x 6 (48)
- R9–15: sc around (48)
- R16: [6sc, dec] x 6 (42)
- (Start stuffing the head now and continue stuffing as you go.)
- R17: [5sc, dec] x 6 (36)
- R18: [4sc, dec] x 6 (30)
- R19: [3sc, dec] x 6 (24)
- R20: [2sc, dec] x 6 (18)
- R21: [1sc, dec] x 6 (12)
- R22: [dec] x 6 (6)
- Fasten off and leave a long tail.
- Sew the opening closed.
Part 2 – Muzzle (Do Not Stuff)
- With secondary color and 3 mm hook:
- Round 1: Ch 6. Starting in 2nd ch from hook: sc 4, 3 sc in last ch
- Working on the opposite side: sc 3, 2 sc in last ch (12)
- Round 2: sc 4, inc x 3, sc 3, inc x 2 (17)
- Round 3: sc 5, inc, sc, inc, sc 5, inc, sc, inc, sc (21)
- Round 4: sc around (21)
- Fasten off with a long tail.
Part 3 – Bear Ears (Make 2, Do Not Stuff)
- With secondary color and 3 mm hook:
- R1: MR, 6 sc (6)
- R2: inc around (12)
- R3–5: sc around (12)
- Fasten off with a long tail.
Part 4 – Bear Arms (Do Not Stuff)
- With main color and 3 mm hook:
- R1: 6 sc in MR (6)
- R2: [sc, inc] x 3 (9)
- R3–12: sc around (9)
- Fold the arm flat and sc 4 across to close.
- Leave a tail for sewing.
General Blanket Pattern Notes
- (1) Each round begins with ch 2 (counts as first dc).
- (2) Corners = 2 dc, ch 2, 2 dc
- (3) Slip stitch to join in beginning chain, turn, slip stitch into same corner before starting next round. This helps to hide the joining slip stitch.
- (4) Change colors after R3, R6, R9, and R12 for a striped effect.
Part 5 – Blanket Square
- With 4 mm hook:
- Ch 4, sl st to form a ring.
R1–R3
- R1: ch2, 2dc in center, ch2, *3dc, ch2* x3, sl st to join. Turn.Sl st in corner sp.
- R2: ch2, dc in same space, *3dc, [2dc, ch2, 2dc] in corner sp* repeat * until last corner, 2dc, ch2, sl st to join.Turn.sl st in corner sp.
- R3: ch2, dc in same space, *7dc, [2dc, ch2, 2dc] in corner sp* repeat * until last corner,2dc, ch2, sl st to join.Turn.
- Fasten off, join new color.
R4–R6
- R4: ch2, dc in same space, *11dc, [2dc, ch2, 2dc] in corner sp* repeat * until last corner, 2dc, ch2, sl st to join.Turn.sl st in corner sp.
- R5: ch2, dc in same space, *15dc, [2dc, ch2, 2dc] in corner sp* repeat * until last corner, 2dc, ch2, sl st to join.Turn.sl st in corner sp.
- R6: ch2, dc in same space, *19dc, [2dc, ch2, 2dc] in corner sp* repeat * until last corner, 2dc, ch2, sl st to join
- Fasten off, join new color.
R7–R9
- R7: ch2, dc in same space, *23dc, [2dc, ch2, 2dc] in corner sp* repeat * until last corner, 2dc, ch2, sl st to join.Turn.sl st in corner sp.
- R8: ch2, dc in same space, *27dc, [2dc, ch2, 2dc] in corner sp* repeat * until last corner, 2dc, ch2, sl st to join.Turn.sl st in corner sp.
- R9: ch2, dc in same space, *31dc, [2dc, ch2, 2dc] in corner sp* repeat * until last corner, 2dc, ch2, sl st to join.Turn.
- Fasten off, join new color.
R10–R12
- R10: ch2, dc in same space, *35dc, [2dc, ch2, 2dc] in corner sp* repeat * until last corner, 2dc, ch2, sl st to join.Turn.sl st in corner sp.
- R11: ch2, dc in same space, *39dc, [2dc, ch2, 2dc] in corner sp* repeat * until last corner, 2dc, ch2, sl st to join.Turn.sl st in corner sp.
- R12: ch2, dc in same space, *43dc, [2dc, ch2, 2dc] in corner sp* repeat * until last corner, 2dc, ch2, sl st to join.Turn.
- Fasten off, join new color.
R13 (Final Round With Decorative Corners)
- R13: ch1, sc in same space,
- *47 sc, [2 sc, ch 21, sl st in base of last sc, 2sc] in corner * repeat from * until last corner. 2sc, ch21, sc, sl st to 1st sc tojoin.
- Fasten off. Weave in all ends securely.
Final Assembly
- Pin all the parts in place first to ensure symmetry before sewing.
- Attach ears between Rounds 4–8 of the head.
- Sew the muzzle onto the head between Rounds 10–15, centered between the eyes. Embroider a triangular nose and straight mouth.
- Embroider eyes between Rounds 9–10, spaced approx. 10 stitches apart. The eyes should be 2 stitches long and 1 row wide.
- Sew the arms underneath the bear head between rounds 20 and 22
- Before sewing the blanket to the bear head, tie decorative knots using the chain loops on each of the four corners of the blanket.
- Attach the blanket by sewing the top edge of the blanket between the bear’s arms, so it looks like the bear is holding or hugging the blanket. Adjust the placement until you’re happy with the look.
- Your cuddly Bear Lovey is now complete — ready for gifting or snuggles!