Easy Crochet Baby Blanket
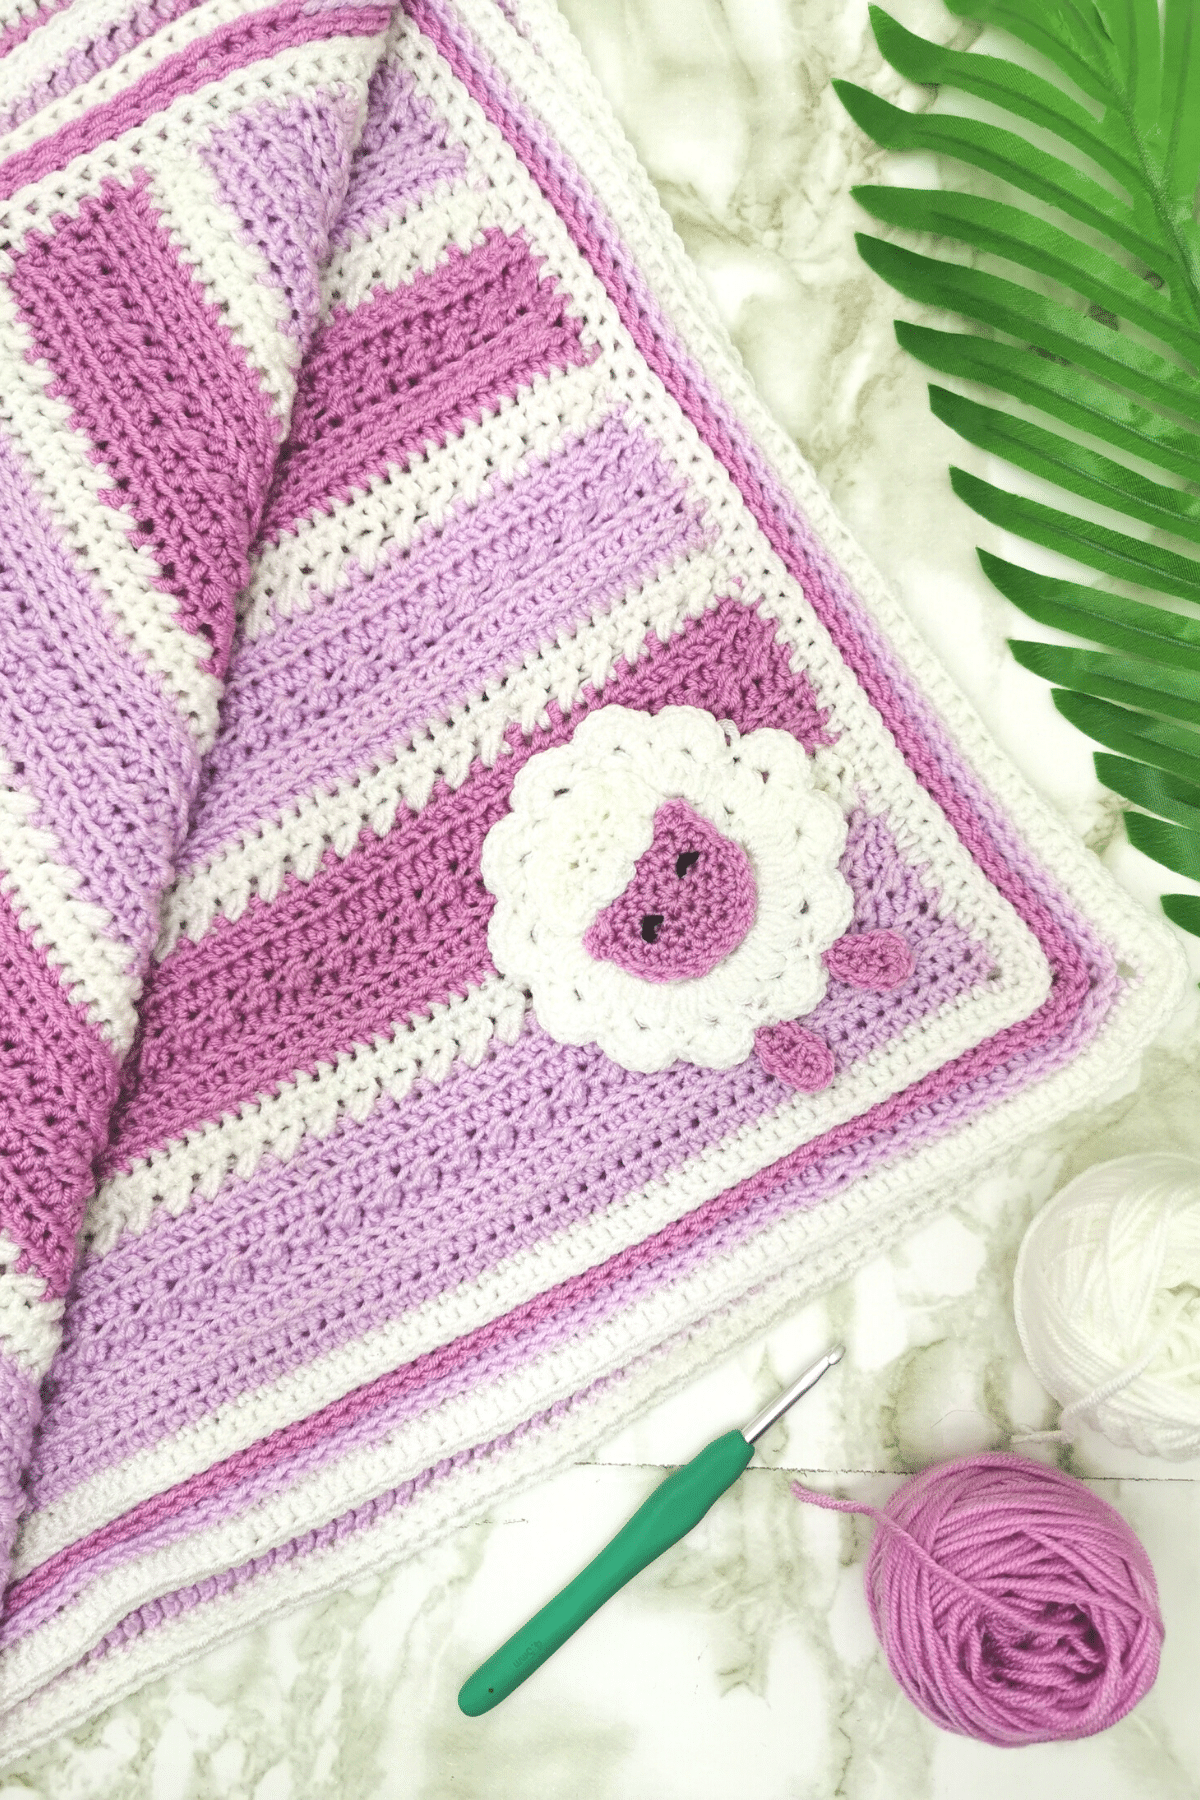
Do you want an easy crochet baby blanket pattern that looks technical and difficult? Well search no further! This crochet baby blanket is made out half double crochets in five different techniques! I know it seems like a lot, but believe me when I say as soon as you finish the first few rows you will be hooked! 🙂
The easy part of this blanket is that it is a repeat pattern. So, if you are a beginner and want to challenge yourself, then this pattern is a great way to do so! It takes a while to make, but it is the perfect project to keep your hands busy while watching your favorite shows or while waiting in the car while Hubby shops for some new tools or whatever. 🙂 This also makes for the perfect baby shower gift or something special to that mom that needs to add a special accessory to their nursery!

Let’s dive into the deeds:
Before you start with this beautiful crochet baby blanket, here are some important things to know and some background around this pattern.
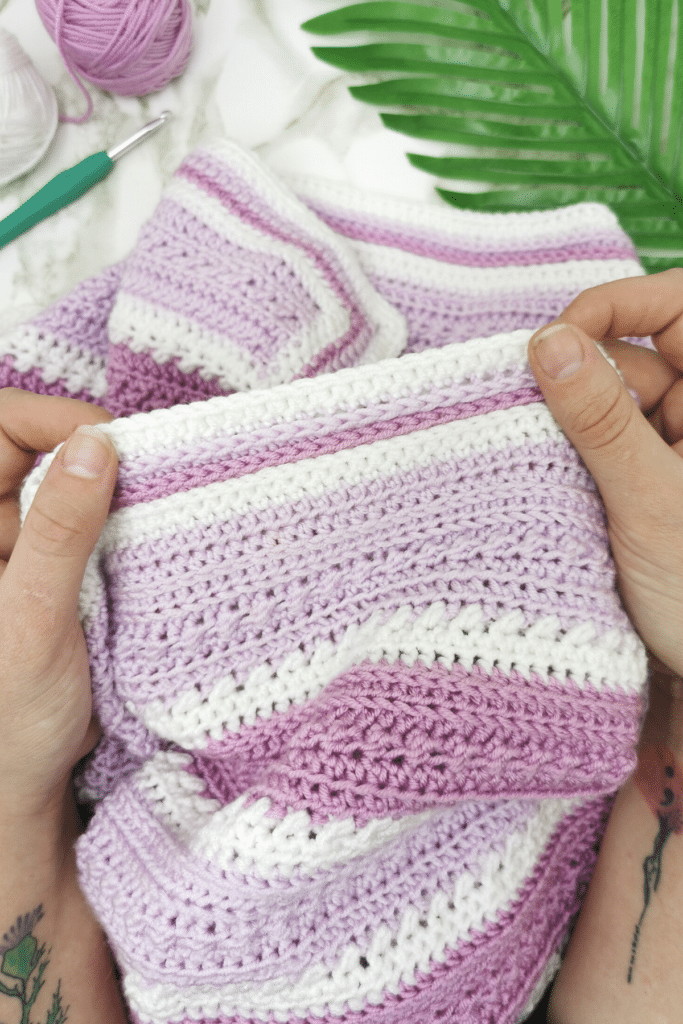
The Detail in the body of the Baby Blanket
So, creating this blanket pattern was no accident! I originally created this pattern as the Infinity Scarf Pattern posted earlier this year on my blog. My Mother In Law tested the pattern for me and she loved it so much that she decided to make a blanket for herself using this pattern! (You and I both know we never make anything for ourselves!) I was in awe of how extremely beautiful a pattern I created as a scarf, turned out to be so incredibly beautiful as a blanket! (Thank You Ma Jane!:))
I just had to share it with you! Below are the colors she chose for her lap blanket!

Back to the baby blanket: for extra cuteness, I added a simple Lamb Applique to the blanket at the end to bring it all together. Click here for the Crochet lamb applique free pattern!

The pattern level:
This Baby Blanket is an Easy/ Skilled Beginner crochet pattern. You need to know the following:
- How to read a pattern
- Half Double Crochet
- 3rd Loop Half Double Crochet
- Back Crossed Half Double Crochet (Click the link for the video tutorial!)
- Crochet into the Back Loop
- Crochet into the Front Loop
You can find picture tutorials for these techniques here, but be sure to keep an eye out for the video tutorials coming soon!! 🙂
Some FAQ and answers:
Can I adjust the size of the Blanket?
You bet you can!! 🙂
By increasing the amount of chains in the beginning of the pattern, you can make this blanket as big as you want! Just keep in mind to crochet an uneven amount of stitches for the width of the blanket and you will obviously need more yarn to complete the project. For a Throw size blanket (measuring 114cm x 161cm / 45in x 63in) you will need at least 13 x 100g/3.5oz skeins of Number 3 DK light weight yarn.
The size of my baby blanket pattern is 39in x 35in/99cm x 89cm including the border.
Here is a blanket size chart you can use as a reference if you would like to make a different size:

What size yarn do I need?
For this Baby Blanket pattern I used Himalaya Everyday Bebe Lux 100% Acrylic, #3 DK light weight yarn in the colors white, pink and lilac. You will need at least 200g/ 7oz (500m/ 546yards) yarn of each color. I purchased this incredible Anti-Pilling yarn from I love Yarn, a shop here in South Africa.
Use the colors and DK weight yarn you prefer. If you can’t find/buy what I used – you can use something like Bernat Softee Baby Yarn or Bernat Baby Sport Yarn.
Let me know if you have any other yarn or size related questions by leaving a comment down below!! 🙂
The materials needed?
You will need the following materials:
- Your choice and colors of #3 DK light weight yarn. 200g/7oz (500m/546yards) of each color.
- A 4.5mm hook (US size 7)
- Scissors
- Tapestry needle
- At least 10 Stitch markers
- Measuring tape
- 1 x Crochet Lamb Applique
Let’s get started!
Now that you know all that is need to be known, I will not keep you any longer from crocheting this beautiful Crochet Baby Blanket.
Remember to follow me on Facebook and Instagram and share your creations with me on all my social platforms. Also pin this on your Pinterest boards if you want to make it again.
And go and subscribe to my YouTube channel!! Brand new addition to the blog where you will find videos of my patterns and tutorials!
Happy Crocheting!!! 🙂
~Nadine

Easy Crochet Baby Blanket
This pattern is written in US Terms
Patten Level:
Easy / Skilled Beginner
Materials:
- 200g/ 7oz (250m/ 273yards) each of 2 colors Number 3 DK light weight yarn. I used pink and lilac.
- 200g/ 7oz (250m/ 273yards) of white Number 3 DK light weight yarn.
- Size 4.5mm Hook (US size 7 )
- Measuring tape
- 10 x Stitch Markers
- Tapestry Needle
- Scissors
- 1 x Crochet Lamb Applique
Abbreviations:
- Ch = Chain
- Hdc = Half Double Crochet
- BLO = Back Loop Only
- Bcr Hdc = Back Crossed Half Double Crochet
- 3rd loop Hdc = Half double crochet into the 3rd loop of the stitch
- FLO = Front Loop Only
- Sl st = Slip Stitch
- St(s) = Stitch(s)
- Rep = Repeat
Special Stitches:
Back crossed Half Double Crochet:
Skip 1 stitch and work a half double crochet into the next stitch. Yarn over and insert the hook around the back of the previous half double crochet into the skipped stitch (from front to back), yarn over and pull through one loop (3 loops on the hook|). Yarn over and pull through all 3 loops on the hook.
3rd Loop of the Half double crochet:
When looking at the half double crochet, you will see that in this pattern the 3rd loop is in the front of your work (the side facing you). The loop is located just below the stitch where you would insert your hook for a normal half double crochet.
Gauge:
10cm x 10cm / 4in x 4in = 12 rows x 14hdc
Finished Size:
Width x Length: 99cm / 39in x 89cm / 35in
Notes:
- The first row is worked into the back bumps of the foundation chain. This creates a nice finish to the piece and it makes it easier to work into when crocheting the border. If you find this too intimidating, feel free to crochet into the foundation chain as normal
- Turning chain does not count as a stitch.
- Number of stitches are shown in brackets () after each row.
- Use stitch markers to indicate every 20 stitches. This makes it easier for you to keep count of your rows and stitches. If you lose count and make a mistake, you will see this on the rows of back crossed half double crochets.
- This blanket can be made in all sizes, you just need to crochet an uneven amount of chains for the width you need and then follow the repeat pattern until you reach the desired length.
- The border of the blanket is worked in continuous rounds.
- PRO TIP: I recommend to weave in your ends as securely as possible throughout making this blanket. This means you will have much less work at the end of your project!
Easy Crochet Baby Blanket Pattern:
Start with first color yarn (Lilac/purple):
Foundation Chain: ch161
Row 1: hdc in 2nd ch from the hook into the back bump of the chain, hdc in each ch/bump across, ch1, turn. (160hdc)
Row 2: hdc in each st across, ch1, turn. (160hdc)
Row 3: hdc in 1st st, hdc in the 3rd loop only across, hdc in the last st, ch1, turn. (160hdc)
Row 4: hdc in 1st st, hdc in BLO across, hdc in last st, ch1, turn. (160hdc)
Row 5: hdc in 1st st, bcr hdc across, hdc in the last st, ch1, turn. (79bcr hdc, 2hdc)
Row 6: hdc in each st across, ch1, turn. (160hdc)
Row 7: hdc in 1st st, hdc in FLO across, hdc in last st, ch1, turn. (160hdc)
Change colors to white yarn in the last st of row 7.
Row 8: hdc in 1st st, bcr hdc across, hdc in the last st, ch1, turn. (79bcr hdc, 2hdc)
Row 9: hdc in each st across, ch1, turn. (160hdc)
Change colors to second color yarn (Pink) in the last st of row 9.
Row 10: hdc in each st across, ch1, turn. (160hdc)
Row 11: hdc in 1st st, hdc in the 3rd loop only across, hdc in the last st, ch1, turn. (160hdc)
Row 12: hdc in 1st st, hdc in BLO across, hdc in last st, ch1, turn. (160hdc)
Row 13: hdc in 1st st, bcr hdc across, hdc in the last st, ch1, turn. (79bcr hdc, 2hdc)
Row 14: hdc in each st across, ch1, turn. (160hdc)
Row 15: hdc in 1st st, hdc in FLO across, hdc in last st, ch1, turn. (160hdc)
Change colors to white yarn in the last st of row 15.
Row 16: hdc in 1st st, bcr hdc across, hdc in the last st, ch1, turn. (79bcr hdc, 2hdc)
Row 17: hdc in each st across, ch1, turn. (160hdc)
Change colors to first color yarn in the last st of row 17.
Row 18-23: Repeat rows 2 – 7, Ch1,turn.
Change colors to white yarn in the last st of row 25.
Row 24-25: Repeat rows 8 and 9, Ch1,turn.
Change colors to second color yarn in the last st of row 25.
Row 26-31: Repeat rows 2 – 7. Ch1,turn.
Change colors to white yarn in the last st of row 31.
Row 32-33: Repeat rows 8 and 9. Ch1,turn.
Change colors to first color yarn in the last st of row 33.
Row 34-39: Repeat rows 2 – 7. Ch1,turn.
Change colors to white yarn in the last st of row 39.
Row 40-41: Repeat rows 8 and 9. Ch1,turn.
Change colors to second color yarn in the last st of row 41.
Row 42-47: Repeat rows 2 – 7. Ch1,turn.
Change colors to white yarn in the last st of row 47.
Row 48 – 49: Repeat rows 8 and 9. Ch1,turn.
Repeat rows 34 – 49
until you reach row 106
or
you have 7 stripes of your first color, 6 stripes of the second color and 12 stipes of the white rows.
Finish off and sew in all the ends.
The Border:
Connect white yarn to the top of the right corner of the blanket.
Round 1:
- Place a stitch marker in the stitch where you attached your yarn.
- Sc the same stitch and in each stitch across until you reach the end of the row.
- In the last stitch (top left), 3sc in the same stitch and place a stitch marker in the second sc (this creates the corner of the blanket),
- then sc across the length of the blanket as evenly as possible.
- In the (bottom left) last stitch, 3sc in the same stitch and place a stitch marker in the second sc, continue until you reach the last stitch again.
- When you reach the (bottom right) last stitch, 3sc in the same stitch and place a stitch marker in the second sc, continue to sc as evenly as possible down the length once more.
- In the very last stitch (top right where you started), which is where the stitch marker is, 2sc in the same stitch.
Round 2: hdc in each sc of the previous round, being mindful to insert 3hdc into the marked stitch in each corner. Be sure to move the stitch marker to the 2hdc of the corner stitches. When you reach the start again, change colors to the second color.
Round 3: hdc in the 3rd loop of the previous hdc of the round, being mindful to insert 3hdc 3rd loop – into the marked stitch in each corner. Be sure to move the stitch marker to the 2hdc of the corner stitches. When you reach the start again, change colors to the first color.
Round 4: hdc in the 3rd loop of the previous hdc of the round, being mindful to insert 3hdc 3rd loop – into the marked stitch in each corner. Be sure to move the stitch marker to the 2hdc of the corner stitches. When you reach the start again, change colors to white.
Round 5: sc in each stitch of the previous hdc of the round, being mindful to insert 3 – into the marked stitch in each corner. Be sure to move the stitch marker to the 2hdc of the corner stitches. When you reach the start again, change colors to white
Round 6: hdc in each stitch of the previous sc of the round, being mindful to insert 3 – into the marked stitch in each corner. Be sure to move the stitch marker to the 2hdc of the corner stitches.
Hi, your blanket is simply beautiful. Am I allowed to sell the finished product if I credit you as the designer? Thanks
Hi Germaine! Thank you for your kind words and yes, you can definitely do that! Have a blessed day!
Hello Nadine, I’m Sue and I just love your patterns 🙂 I am currently making your Easy Crochet Baby Blanket for my new grand-daughter. I just love the look and the pattern however I am having a problem understanding just what to do on reaching rows 18 forward. I am not sure how to understand “Repeat rows 2 – 7 alternatively” – I repeated rows 2-7 in place of rows 18-23 and that looked fine, however for rows 24-25 I repeated row 2 and row 3 and it just doesn’t look right so I think I am mis-reading or misunderstanding what I’m supposed to do HELP !!!! Many thanks – sue
Hi Sue! I’m so glad you are enjoying my patterns! Thank you for your comment, I looked it over and noticed that the pattern had a typo from row 24 and 25. When you crochet the pattern following the color changes you should repeat row 8 and 9 when crocheting rows 24 and 25. So the main pattern repeat is form row 2 – 9, but the last two rows of the repeat is where you color change to white. I will change the pattern accordingly. Hope this helps and I would love to see the finished blanket once your done!
Hi Nadine – many, many thanks! that all makes sense to me now!
I will definitely send you a picture when it is finished
Have a great week, I sure will now – Sue
Hi Nadine Thanks to your help, the blanket was finished and I just love it as does baby Isla and her Mummy
I’m not sure how to send you a picture so if you email me I’ll reply to your email and attach the pic
this blanket really is beautiful, thank you so much
sue
This is gorgeous I just love the colors! I can’t wait to get started, one of the few patterns you actually click on and it takes you to the pattern. Thank you so much for sharing 😊
omg I can’t wait to start this baby blanket. it sounds like a very easy pattern to follow.
It really is so easy! I hope you enjoy making it!
Is round 6 of the border the last round? It sounds like it is going to be continued, “ Be sure to move the stitch marker to the 2hdc of the corner stitches.”
If this is the end why would you move the stitch marker?
Please reply as soon as you can because I’m there and I need to finish it for a baby shower.
Hi Brenda!
Yes, round 6 of the border is the last round and you can remove the stitch marker at this point.Thank you for pointing this out! I will remove the last sentence of that round. I hope you enjoyed making this blanket!
they all look beautiful, can’t wait to start on a baby blanket.
thank u so much.